A mushroom tattoo can be as spare as a curved cap and stem or as elaborate as a tiny woodland scene. Start with the part you want people to notice: the cap for a familiar silhouette, the underside for linework, or the setting for a story. These mushroom tattoo ideas cover each approach, from a tiny outline to a full forest-floor composition.
Image disclosure: The hero and all 22 illustrations are AI-generated design concepts. They do not show real or healed client tattoos. Use them as a starting point for a drawing with your tattoo artist.
Choose the silhouette before the details
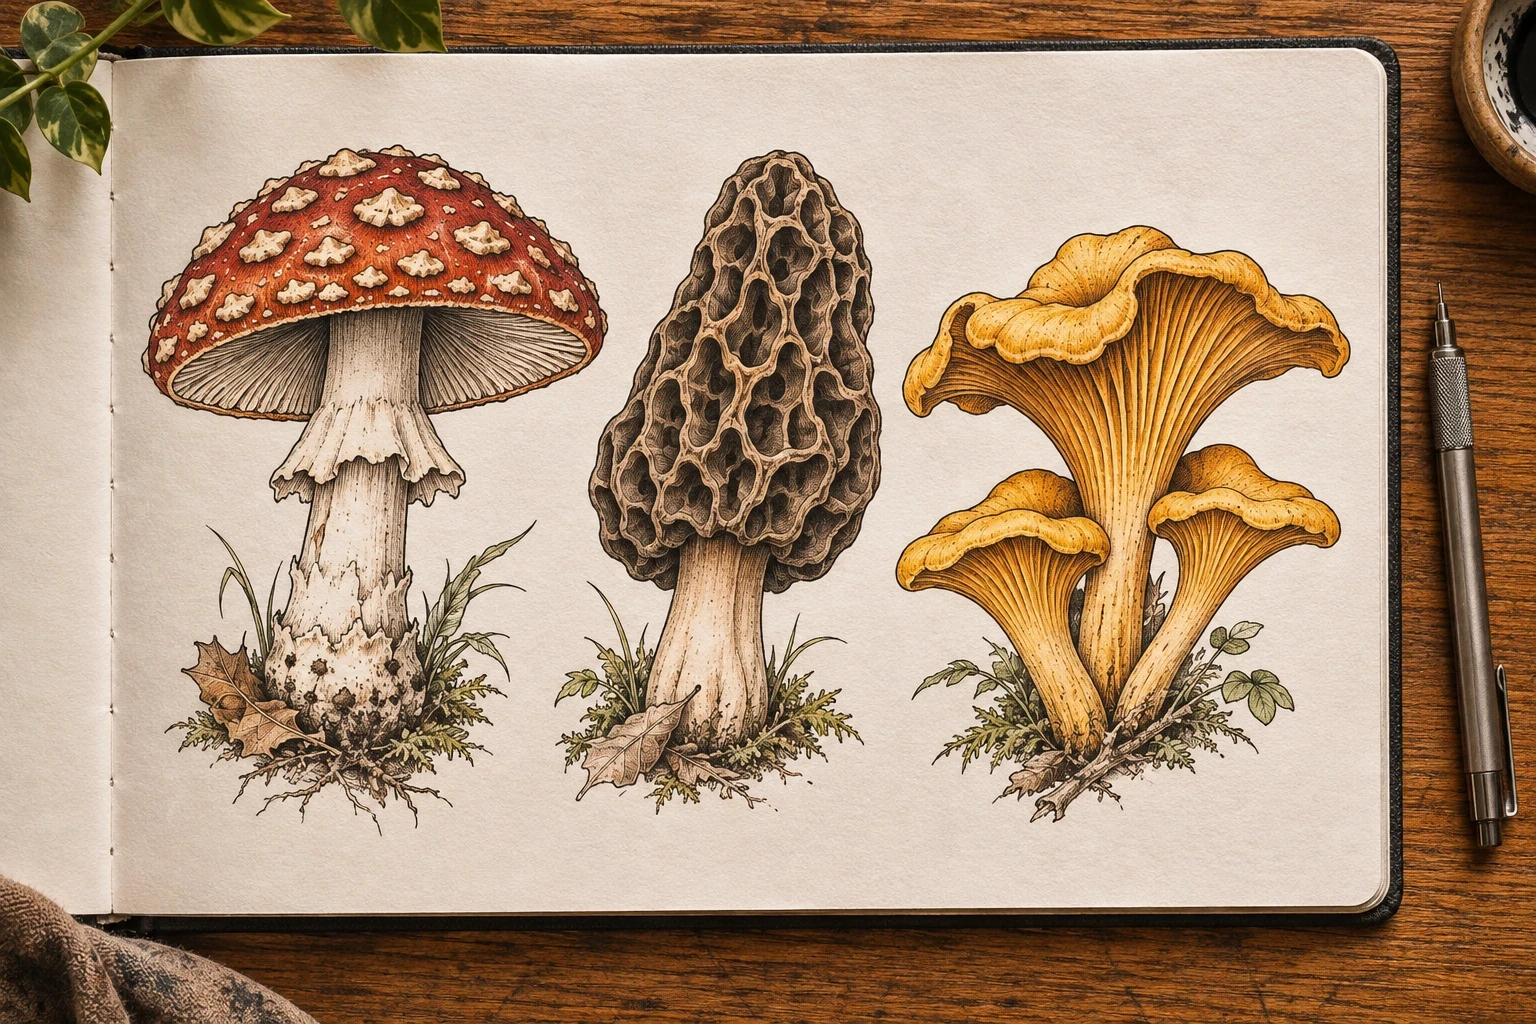
If your favorite detail is the underside, get a reference that actually shows it. The National Park Service’s illustrated introduction to fungi distinguishes gills, ridges and pores. The USDA Forest Service has references for the pitted cap of a morel and the ridges under chanterelle caps. For a species-specific tattoo, bring a reference photo alongside the concept. These illustrations are not for identifying mushrooms in the wild.
1. Small fine-line mushroom
A single umbrella cap and curved stem make a readable small tattoo. Use the cap edge as the strongest line and treat the underside as optional detail.
This fits the inner wrist or a gap between larger pieces. At stencil size, check whether the cap and stem still read separately before adding any lines.
2. Two mushrooms leaning apart
The taller stalk sets the direction while the shorter cap gives the pair a low counterweight. Three loose grass blades can bring them together without a solid base.
Place the taller stalk along the length of the forearm. For a smaller piece, retain the different heights and leave out the grass.
3. Low-angle mushroom with radial gills
Tipping the cap toward the viewer makes the underside the focal point. Lines that fan away from the stem suggest volume before any shading goes in.
Give the artist room to space the lines, especially where they meet the stalk. A wider area like the calf suits this shape better than a thin strip of skin.
4. Traditional red fly agaric
A scarlet cap, pale spots and a strong outline give this design the look of traditional flash. A short stalk keeps the patch of red from feeling top-heavy.
Ask for a few large spots with open space between them. A leaf at the bottom can add a second color without competing with the cap.
5. Morel with engraved honeycomb texture
A morel is recognizable by the pits and ridges that break up its cap. This engraving-style interpretation uses irregular cells, so it reads as a morel rather than a grid or a pinecone.
The long oval works along the outside of a forearm or shin. Have your artist keep fewer, larger cells if you want the tattoo small.
6. Golden chanterelle fans
Chanterelle-inspired caps bring a wavy, funnel-like shape into the mix. The warm palette gives the cluster a strong silhouette, and the folds can be drawn as a handful of branching strokes.
A cluster needs breathing room at the edges. Angle one cap sideways and give the remaining caps different heights so each shape stays distinct.
7. Oyster mushrooms on wood
Oyster-inspired fans stack sideways from a short piece of wood. The repeated arcs suggest a shelf, while the dark bark sets off the pale undersides.
This piece suits a horizontal opening between tattoos or the curve over a shoulder blade. Keep one or two fans unobstructed to show the gills.
8. Shaggy inkcap with black drips
A tall bell and shaggy marks make this a darker alternative to the round toadstool. The drops continue the downward line of the stalk and give the design a loose ink-drawing finish.
On a narrow placement, let the outline carry the shape. Use the texture around the edge instead of making the whole cap equally dense.
9. Woodcut bolete with pores
A stout stem and a wide cap give a bolete the weight of a woodcut print. On the cap's underside, a dotted patch suggests pores; this is the detail to save if you simplify the design.
A strong hatching direction is easier to read than an all-over pattern. Let the artist leave light breaks between the darkest strokes.
10. Puffball and a cloud of dots
A closed round puffball beside one releasing a small dotwork cloud makes a recognizable silhouette without an umbrella cap. The empty space above the two forms gives the puff somewhere to go.
The dot cloud can trail toward the elbow or away from a neighboring tattoo. Keep the main outlines darker than the dots.
11. Mushroom with an arching fern
The fern frond changes a short mushroom into a long piece with a natural bend. Let the frond arch across open space so its leaflets stay visible.
This shape can follow the outer calf or upper arm. If the fern is the element you care about most, start with these fern tattoo ideas to compare silhouettes.
12. Mushroom patch on a cushion of moss
A low green base gives a cluster the appearance of a small patch of forest floor. A few dots and short strokes suggest moss without outlining every bit of it.
Use an uneven edge and leave the upper portion open. This works on the calf or arm where the tattoo can read as a loose oval rather than a band.
13. Woodland scene at the roots of a tree
A trunk and exposed roots give the mushrooms a sense of scale. Keep the top edge open and lead the eye down to the caps, where the widest light spaces belong.
Use this for a larger calf or upper-arm piece. To bring it down in size, keep the base of the trunk and one mushroom and simplify the leaf litter.
14. Moth above an ochre mushroom
The spread wings make a broad top half, balanced by a much smaller cap below. A clear gap between the moth and mushroom helps both silhouettes stay readable.
This centered design suits an upper arm or shin. Pick a few large wing markings before adding fine veins or speckling.
15. Snail beside a mushroom
A low snail with a spiral shell makes the mushroom feel tall without needing a background scene. Both subjects can share a short line of grass.
This reads best across the arm or above the ankle. Let the artist space the shell spiral and the stalk clearly if you reduce the size.
16. Crescent moon and mushroom
A crescent above a dark cap is a compact way to suggest a woodland scene at night. A few widely spaced dots can balance the crescent without filling the gap.
Tilt the crescent toward the cap so the two forms feel related. If you prefer a wider shape, put the moon off to one side instead of directly above.
17. Storybook mushroom cottage
A mushroom cap doubles as a roof, with a round wooden door set into the stalk. The small window and stepping stones give it a sense of scale. You can leave out the window if the artist needs more open space.
Pick the door shape first. A round door takes less detail than a plank door with hinges and still reads clearly at a modest size.
18. Lilac mushroom with starbursts
A broad lilac and pink cap and a teal underside make the color contrast the focus. Four starbursts frame the cap without tying the design to a particular species.
Ask the artist to set the scale of the stars and cap before choosing extra colors. A limited palette leaves room for one darker outline to hold the shapes together.
19. Mirrored mushrooms for a matching pair
Two mushrooms share one cap profile and lean in opposite directions. Each half can work by itself, which makes this useful as a matching design for two people.
Agree on one shared feature, such as the cap line or a small dot. Test each half separately at its final size and placement.
20. Open mushroom ankle band
Alternating mushrooms and little sprigs can follow a shallow arc with open ends. The gaps are part of the design and keep the silhouettes from running together.
Ask to see the stencil from the front and side. Adjust the gaps where the ankle curves rather than stretching each mushroom to fill the space.
21. Mushroom silhouette in negative space
A pale mushroom cut out of a black oval makes the uninked space the subject. There is room for one broad cap and a sturdy stem without any inner texture.
Compare an oval with a looser edge before committing to the amount of black. Keep the stem wide enough to hold the silhouette at the size you want.
22. Indigo mushroom with an ink wash
A loose blue wash gives the cap a softer edge. Keep some contrast around the thin stalk so the whole motif still reads where the pigment fades.
Ask for examples of healed color work from the artist. Discuss where the color ends and how much of the black line you want to keep visible.
Where to put a mushroom tattoo
- Small opening: Choose one cap and stem with plenty of open space, or two simple silhouettes. Fine gills and dots are the first details to consider dropping.
- Long, narrow area: Look at the morel, inkcap or fern. Align the stem with the forearm or calf, then decide whether the cap should face in or out.
- Broad placement: A group of oyster fans or a tree-root scene needs width. Try the stencil from a few angles to see which caps remain distinct around the curve.
What to bring to your artist
Bring one image for the mushroom shape and another for the kind of linework or color you like. Point to the detail you would keep if the artist had to simplify the rest. If you like the color contrast in these designs, compare the orange and black palette in these marigold tattoo ideas. Then ask to see the stencil at actual size, alongside examples of the artist’s healed work in the style you want.
Mushroom tattoo FAQs
What can a mushroom tattoo represent?
It can commemorate a place you love, suggest an interest in fungi, or capture the feeling of a storybook forest. A specific species, a familiar patch of moss or a fern from a favorite trail can make the connection personal.
Which design works best as a tiny mushroom tattoo?
Start with the single fine-line cap or a simple pair. Choose one main line detail and ask your artist to test whether it reads at the intended size.
Can you do a mushroom tattoo in black ink?
Yes. The gill study, morel and woodcut bolete each use line or texture to define the mushroom. A simple outline is another option if you prefer less shading.