A Japanese oni mask tattoo can be a compact face on the forearm or the focal point of a much larger composition. Horns, a heavy brow and a strong jaw create the first impression, but the surrounding space determines whether the face stays readable.
These 16 Japanese oni mask tattoo designs explore different layouts, supporting subjects and placements. Compare an isolated mask with waves, flowers, a fan or a full sleeve, then choose the features you want an artist to develop into an original drawing.
Image disclosure: All images are AI-generated design concepts. They are not real tattoos, healed client photographs, historical mask reproductions or a particular artist’s portfolio. An experienced tattoo artist needs to review and redraw the details for your body before tattooing.
Choose a mask reference before assigning a meaning
Oni imagery has cultural contexts beyond tattoo inspiration. The Japan Tourism Agency’s account of the Setsubun-e ritual, for example, describes bean throwing to drive out oni, translated there as demons. That ritual context does not establish one universal meaning for an oni tattoo, or a promise that wearing one offers protection.
Be precise with names when collecting references. The Met catalogs separate carved mask subjects titled Ōni and Hannya. Do not assume that every horned Japanese mask is the same subject. Bring the actual reference and ask an artist familiar with Japanese imagery to help identify the direction you mean.
The concepts below use broad, stylized oni-inspired faces rather than claiming to reproduce a specific historic mask. Their color choices are design decisions, not a fixed dictionary of emotions or spiritual effects. For wider context and other motifs, browse our Japanese tattoo designs; for a broader range of darker subjects, compare our demon tattoo ideas.
1. Compact red oni mask on the forearm
A single red mask keeps the focus on the face. Ivory horns and tusks stand out against the warm color, while a dark outline holds the silhouette together. With no flowers or background, the expression does all the work.
Decide the direction of the mask with your arm relaxed, then check it as the forearm turns. Keep the eyes, nostrils and mouth separate in the drawing rather than squeezing them into the smallest possible footprint. This is a useful starting point if you want one complete subject without planning a sleeve around it.
2. Blue oni mask with curling waves
Deep blue gives this mask a cool palette that connects naturally to its wave background. Pale foam separates the face from the water, and the waves broaden the lower part of the calf composition. The supporting shapes create movement without requiring a second face.
The mask needs to remain distinct from the waves even where their colors are similar. Ask the artist to establish the face outline first, then choose which foam edges stay light. Review the bottom boundary above the ankle so the piece finishes deliberately instead of narrowing into a crowded strip.
3. Black and grey mask with a peony
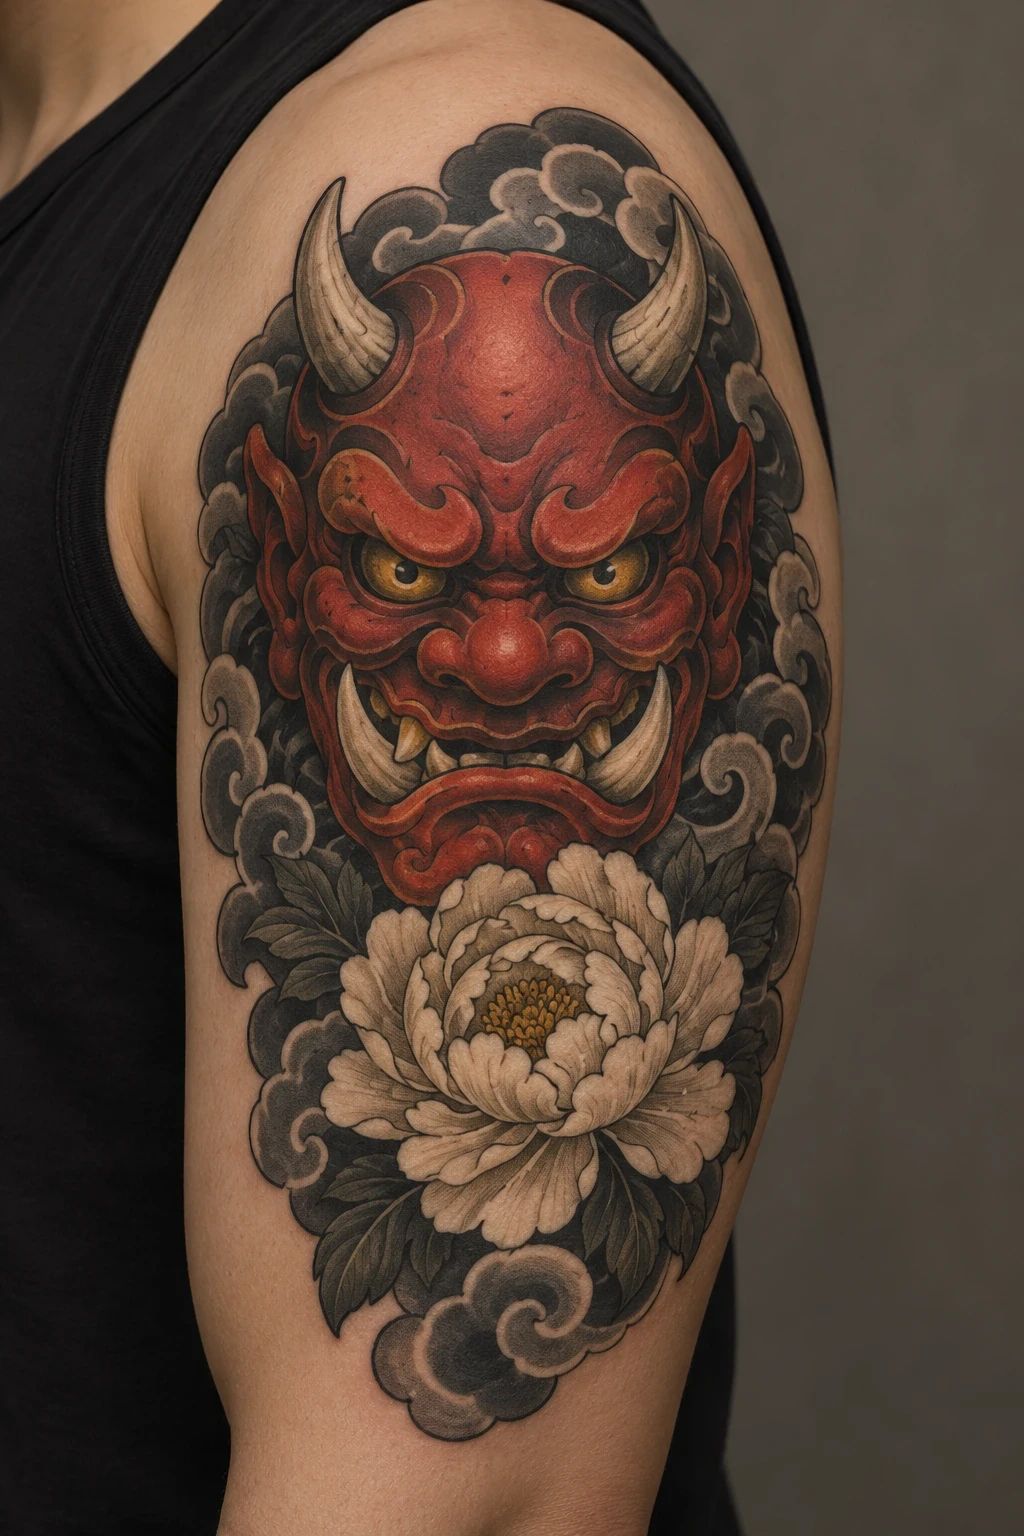
A pale peony offers a rounded counterpoint to the mask’s horns, brow and tusks. The black-and-grey palette puts the emphasis on contrast, with the flower and face separated by darker background shapes. A slight turn of the mask adds depth without needing photographic realism.
Compare the face and flower at arm’s length before deciding on extra shading. The peony should support the mask, not obscure its lower jaw. Ask the artist where the lightest areas will remain, especially around the eyes, teeth and flower center, so those details have room in the final drawing.
4. Ivory mask framed by smoke
An ivory face against charcoal smoke creates a strong light-and-dark arrangement. The smoke can follow the outside of the thigh while the mask stays relatively compact. Open skin between the wisps helps prevent the background from becoming a solid dark block.
Keep the smoke secondary to the face. Your artist can use a few larger curves instead of many tiny wisps, adjusting them to the placement. Discuss the size of the full composition rather than judging only the mask: a generous smoke frame uses more space than an isolated face even when the face itself is the same size.
5. Red mask with maple leaves
Orange-red maple leaves bring a diagonal rhythm around a darker red mask. Grey wind bands provide a quieter layer behind them. The leaf shapes break up the outside edge while the face remains the visual center of the forearm.
Choose how much movement you want before adding more leaves. A few well-spaced shapes can give the artist a clearer route around the arm than a dense scatter. If you want a composition grounded in a particular Japanese tattoo tradition, ask the artist to guide seasonal pairings and background choices rather than treating this generated arrangement as a rule.
6. Oni mask with a diagonal katana
A single diagonal sword gives the upright mask a contrasting line. Keeping the blade behind the face separates the two subjects and avoids turning the design into a tangle of weapon parts. Red, charcoal and steel grey keep the palette restrained.
The handle, guard and blade need a coherent relationship in the drawing, including the sections hidden by the mask. Ask the artist to simplify the sword if its details compete with the eyes and tusks. A clear diagonal works better here than adding several crossed weapons merely to fill the available calf space.
7. One mask divided into red and blue
A single face split into two colors creates contrast without doubling the subject count. The center line joins the forehead, nose and jaw, while matching ivory horns and tusks hold the shape together. The effect is graphic and direct.
Treat the two colors as a personal design choice unless you have a specific reference you want to discuss. There is no need to invent a universal meaning for the split. Ask the artist to keep the facial anatomy continuous across the center so the result reads as one mask rather than two disconnected half-faces.
8. Blackwork mask inside a brushstroke circle
A broken circle frames this mask without forming a solid border. Black areas and open skin establish the face, giving the design a different character from the colored concepts. The circle supplies an outer shape while leaving room for the horns to remain clear.
This is a modern graphic treatment, not a claim to reproduce a particular traditional mask or brushwork practice. Discuss the weight of the circle and how much of it should stay open. Keep its dark edge from merging with the horns or cheek outline, especially when the tattoo is viewed from the side of the shoulder.
9. Chest mask between pale peonies
A centered red mask and two pale flowers create a broad chest arrangement. The mask establishes the sternum as the focal point, while the peonies extend the piece toward each pectoral. Dark leaves can connect the elements without covering the entire chest.
Ask the artist to check the stencil in a relaxed stance and compare the flower placement to your collarbones. The two sides can feel balanced without being exact duplicates. For more general placement options, see our chest piece tattoo ideas and decide whether you want this full-width composition or a smaller central mask.
10. Navy mask above a golden chrysanthemum
A golden chrysanthemum gives the lower calf a bright, rounded anchor beneath the navy mask. The contrast between the two subjects makes the hierarchy clear. Muted leaves and grey clouds connect them while leaving the flower center distinct from the mask’s mouth.
Set the sizes of the two focal shapes together. A highly detailed flower squeezed into a leftover gap may compete with a larger, simpler face. Ask the artist which petal details they would preserve at the chosen size, and make sure the horns still have enough space at the upper boundary of the piece.
11. Terracotta mask with a braided cord
A decorative cord frames the mask with a more defined edge than smoke or clouds. The knot above and short tassels below create a vertical arrangement, while the terracotta face keeps the palette warm. The cord is supporting ornament, not an additional face or figure.
Bring a specific reference if you want a cord associated with a particular object or practice. This concept uses a decorative braid and makes no claim about a sacred rope. Review the knot and the route of the braid in the artist’s drawing so the loops reconnect cleanly instead of appearing to pass through the mask.
12. Ivory mask with a green snake
The green snake introduces a moving line around the more static mask. Its head and tapering body create separate points to follow, while ivory and green make the subjects easy to distinguish. Small red accents can balance the palette without adding another dominant motif.
Trace the snake’s full route from head to tail before approving the design. Any sections hidden behind the mask must reconnect convincingly. Give its head enough room to remain readable, and ask the artist to reduce the number of coils if the outer forearm becomes too crowded for both subjects.
13. Golden mask with tiger-like stripes
Black stripes across a gold mask create a different surface treatment while keeping the subject a mask. Broad ivory horns and tusks preserve its outline, and restrained red accents finish the lower edge. The upper back provides width for the face without compressing it into a narrow placement.
Describe this as a modern striped-mask concept rather than a documented historical mask category. Ask your artist to keep the underlying face readable before distributing stripes across it. The brow, eyes and nose should remain distinct; the pattern should not accidentally turn the mask into an unrelated tiger portrait.
14. Mask in front of an open fan
An open folding fan provides a wide, pale backdrop for a red mask. Its ribs establish a clear direction behind the face, while a small wave motif adds interest without using written characters. The thigh placement gives the fan room to spread.
The fan needs a believable pivot and a coherent set of ribs even though parts are hidden behind the mask. Ask the artist which fan details can be simplified to keep the face dominant. Avoid filling every panel with tiny pictures or text; this composition works through the contrast between one strong face and a quieter background.
15. Oni mask sleeve with open wind bands
A larger mask can anchor the upper arm while wind bands carry the composition across the elbow and down the forearm. A red peony adds a second focal point lower on the sleeve. Open channels between the darker bands help divide the arm into readable shapes.
Plan the entire shoulder-to-wrist composition before starting, including the inner arm and wrist boundary. A single outer view cannot show every connection. Our Japanese full sleeve tattoo ideas compare more background and focal-subject arrangements if you want to expand this direction.
16. Two masks in a diagonal pairing
A red mask above and a blue mask below create a paired design with a clear diagonal route. Each face keeps its own horns, eyes and jaw; a small cloud curl connects the outside edges rather than merging their anatomy. The arrangement offers two expressions without requiring a full sleeve.
Give both masks enough room to remain complete. If one must be made much smaller to fit the arm, consider simplifying its features or using just one face instead. Ask the artist how the pair will look from the front and side, since a flat reference can hide how far the lower mask wraps around the arm.
Match the placement to the whole composition
Judge the space needed for the horns, jaw and background together. A face that fits on a forearm may need more room once you add a flower, sword or frame. Have the artist mark the full boundary before you settle on the amount of detail.
- Forearm: Compare the mask upright with your arm resting naturally, then turn the arm. A narrow outside view can hide how far the cheeks or horns wrap around the sides.
- Upper arm: The shoulder curve can accommodate a broad face or a round frame. Decide whether the piece is complete on its own or should eventually connect to a sleeve.
- Calf: A vertical mask-and-flower arrangement or sword composition can follow the leg. Review the lower endpoint and leave room for the background to finish above the ankle.
- Thigh: A fan or smoke frame can spread wider here. Check the layout against the edge of shorts and the amount of coverage you want visible.
- Chest or upper back: Compare the stencil across the torso in a relaxed stance. A large central mask should relate to the shoulders and surrounding space rather than simply being enlarged from an arm reference.
If you prefer less coverage, our minimal Japanese tattoo ideas offer a useful comparison. A simpler direction still needs enough room for its essential shapes; removing the background does not make every detailed face suitable for a tiny placement.
Check the reference, expression and supporting subjects
Begin with the face. Choose the brow shape, mouth opening, horn direction and degree of realism before adding background. The same palette can feel very different with a tight mouth, exposed tusks or a more exaggerated expression.
Bring an exact reference if you want a named mask, a theatre subject, a festival mask or a particular fictional character. These are different briefs. An oni-inspired tattoo should not acquire a label simply because an online image search grouped it with other horned faces.
Then choose what the supporting subject contributes. A peony gives a softer rounded shape, a sword adds a strong diagonal, waves carry motion, and a fan creates a broad frame. Choose one clear purpose before combining several of them. If tradition is your goal, let a specialist guide pairings and background structure.
Use these images as conversation starters rather than finished stencils. Review the artist’s own healed work and ask how they will redraw the face around your anatomy. In a generated reference, attractive shading can distract from a horn connection, tooth shape, snake overlap or fan rib that still needs correction.
Choose a palette for contrast, not a promised meaning
Red can make the face stand apart from grey clouds or pale flowers. Blue works well as a cool focal color, provided similarly colored waves do not hide the mask’s edge. Ivory gives the artist a light shape to set against darker smoke or a snake.
For black and grey, identify the lightest areas in advance: eyes, tusks, forehead planes or flower petals. For blackwork, agree which features will be defined by open skin. Those decisions affect readability more directly than keeping every tiny line from a reference.
There is no need to attach a universal emotional meaning to a red, blue or split-color concept. Explain your own association if one matters to you. Ask the artist about their experience with your skin tone and compare real portfolio examples when evaluating a palette; AI skin and ink do not predict your result.
Bring a short consultation brief
Prepare the subject reference, preferred placement, approximate coverage and one or two supporting elements. Say what you like about each reference rather than presenting several unrelated images as a fixed collage. Tell the artist about nearby tattoos and any plans to expand the work later.
Ask for an estimate based on the actual drawing and placement, how appointments would be divided, and what could change the quote. A compact isolated mask and a full sleeve are different projects. If you are comparing the larger option, our sleeve tattoo cost guide can help frame the questions; use the artist’s current quote for your budget.
If you want Japanese writing, have the actual wording and lettering checked by a fluent reader before the stencil is approved. The concepts here deliberately omit script. Our Japanese word tattoo ideas can help you explore that as a separate decision rather than adding decorative characters at the last minute.
Care and realistic expectations
Follow your artist’s instructions for a fresh tattoo and seek medical advice for concerning skin changes. These concept images do not demonstrate healing, long-term wear or how a particular ink will behave on your skin.
For healed tattooed skin, the American Academy of Dermatology advises sun protection because UV light can fade some inks. Its guidance includes broad-spectrum, water-resistant SPF 30 or higher sunscreen before going outside, reapplied at least every two hours. A new or changing skin reaction should be assessed by a dermatologist.
Japanese oni mask tattoo FAQs
Are oni and Hannya interchangeable names?
Do not use them as automatic substitutes when briefing an artist. Identify the actual mask reference and its context. Museum collections catalog distinct subjects under those names; a horned silhouette alone is not enough to identify every image you find online.
Does an oni mask tattoo always mean protection?
No single meaning should be assumed for every wearer. Explain any personal association you want the design to convey. A cultural ritual involving oni is context to learn about, not evidence that a tattoo provides a spiritual or physical benefit.
Can I have a small oni mask tattoo?
Ask the artist to simplify it for the intended size. A broad silhouette with clearly separated eyes, horns and mouth may be a better brief than a miniature version of a dense sleeve reference. Let the final drawing determine how much detail the placement can accommodate.
Do I need a Japanese-style background?
No. An isolated mask, decorative circle or paired arrangement can be complete without full background coverage. If you want traditional composition, discuss that goal with a specialist before choosing the framing and accompanying subjects.
Can one mask become part of a sleeve later?
Tell the artist about that plan before the first appointment. They can consider the direction of the face, the background route and the space reserved around it. Adding a sleeve later is easier to discuss when the original placement has already been considered as part of a larger arm composition.